1600 Lumen Trionic LED Front Light with Battery Pack

This manual both shows how you attach the light holder and the light on a Walker (left column below) and also how you attach them on a Veloped (right column below).

In the left-hand photo, A shows the holder attachment parts for a Walker (2 screws + 2 washers). B shows the holder attachment parts for a Veloped (1 screw + 1 knurled nut + 1 nut).

1600 Lumen Trionic LED Front Light with Battery Pack

Attaching the Light Holder

Instructions for a Walker
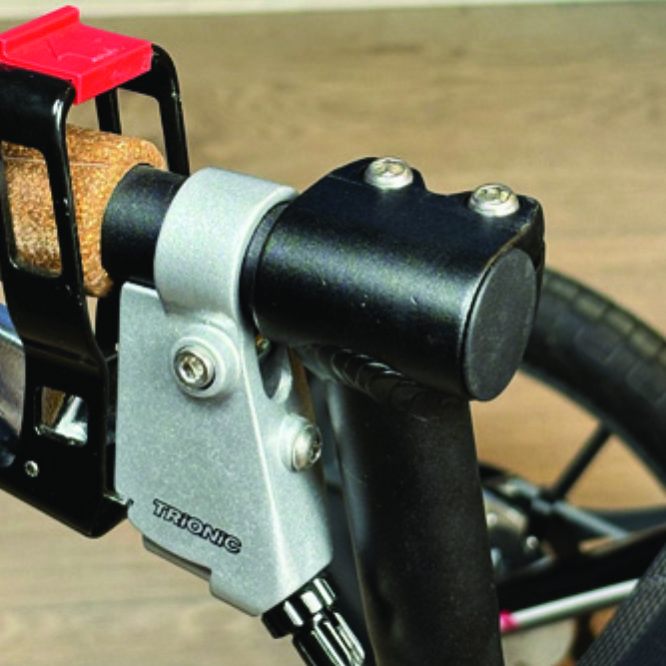
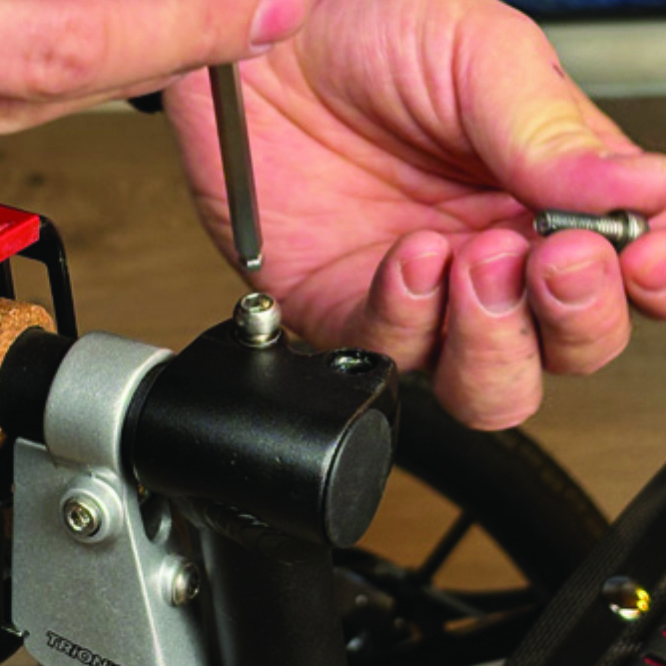
On top of the black semi-vertical tube, locate the two screws that clamp the grip tube, situated in front of the brake lever.
A1. On top of the black semi-vertical tube, locate the two screws that clamp the grip tube, situated in front of the brake lever.
Loosen both screws with the 5mm allen key included with the LED light.
A2. Loosen both screws with the 5mm allen key included with the LED light.
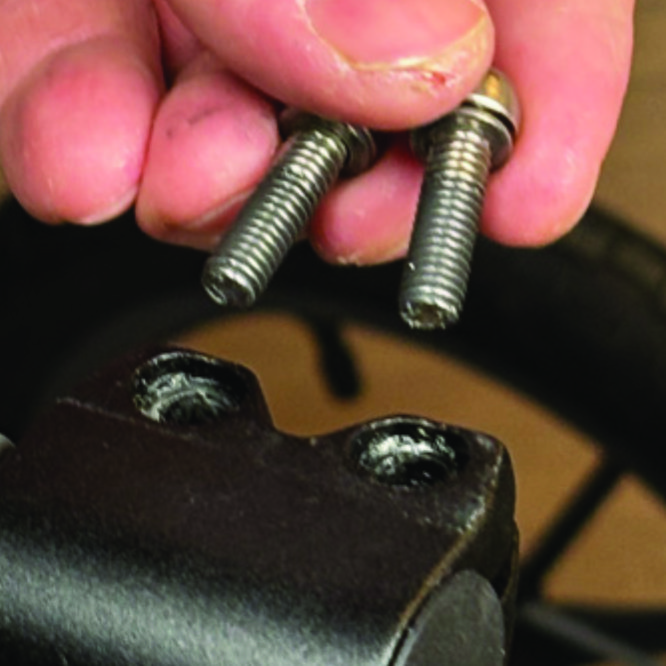
Remove the two screws from the grip clamp.
A3. Remove the two screws from the grip clamp.
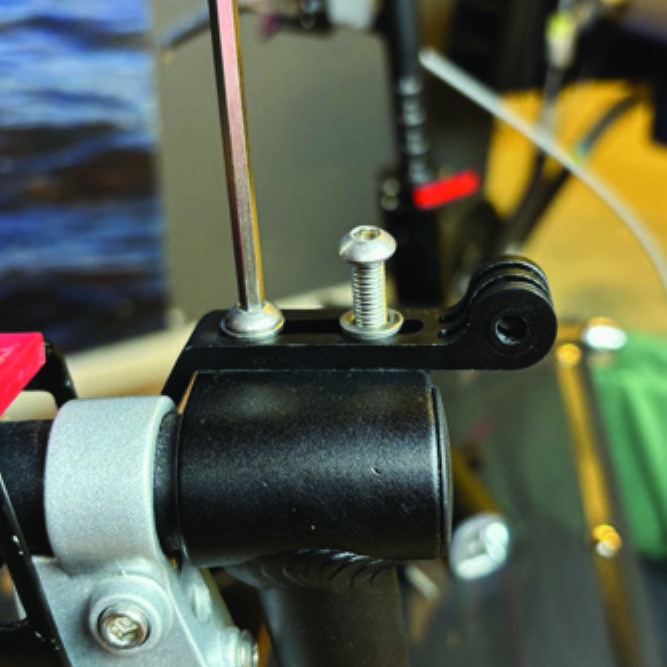
Place the light holder on top of the grip clamp, with its circular and slotted light attachment pointing forwards and upwards. Enter the two screws with washers into the holes of the clamp.
A4. Place the light holder on top of the grip clamp, with its circular and slotted light attachment pointing forwards and upwards. Enter the two screws with washers into the holes of the clamp.
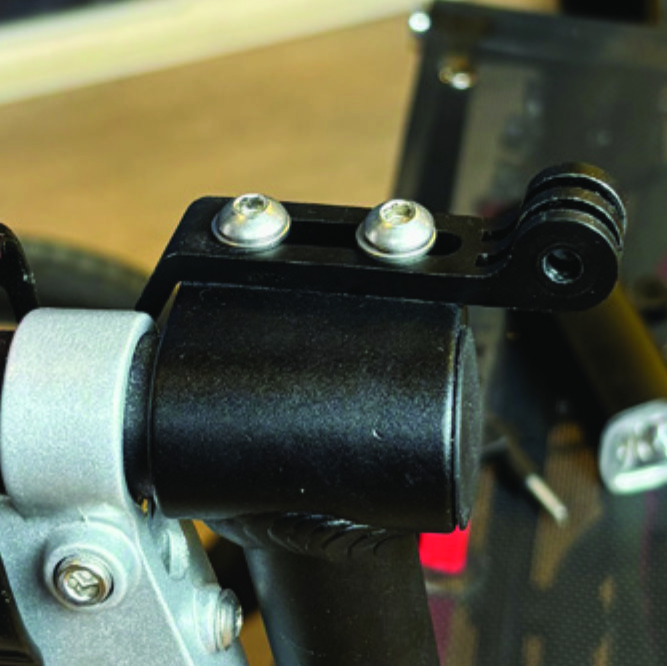
Tighten the two screws with the 5mm allen key. NOTE: It is important that you tighten the screws properly as they secure the grip tube with its rubber grip and brake lever.
A5. Tighten the two screws with the 5mm allen key. NOTE: It is important that you tighten the screws properly as they secure the grip tube with its rubber grip and brake lever.

Instructions for a Veloped

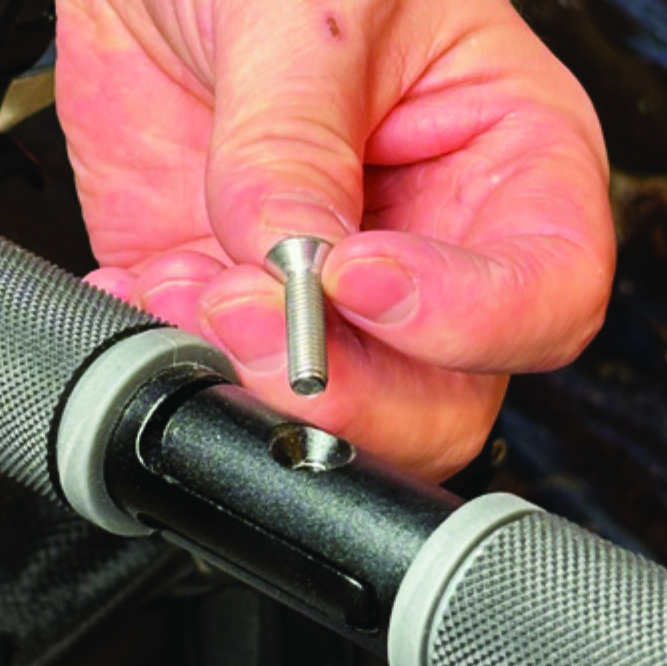
Locate the screw at the center folding hinge of the U-shaped grip bar of the Veloped. Unscrew the screw with the included 4mm allen key and remove it.
A1. Locate the screw at the center folding hinge of the U-shaped grip bar of the Veloped. Unscrew the screw with the included 4mm allen key and remove it.
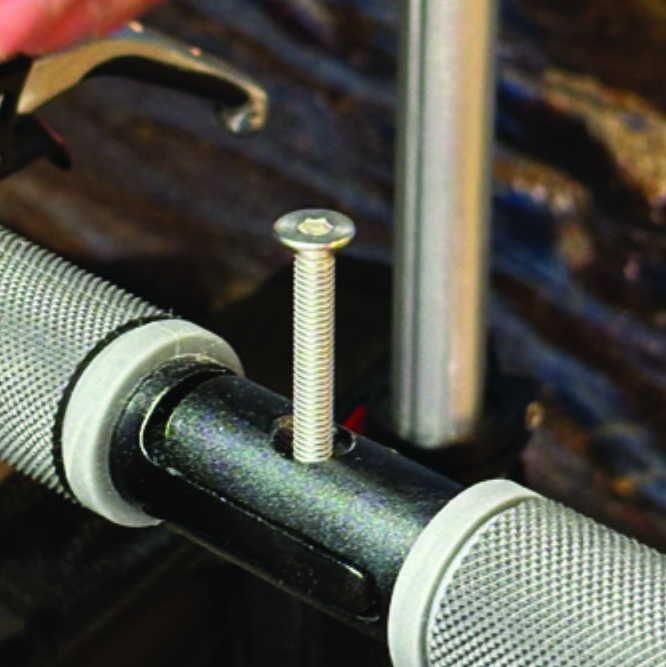
Replace the old screw with the longer screw included with the LED light. Attach the longer screw to the hinge and tighten it with the 4mm allen key.
B2. Replace the old screw with the longer screw included with the LED light. Attach the longer screw to the hinge and tighten it with the 4mm allen key.
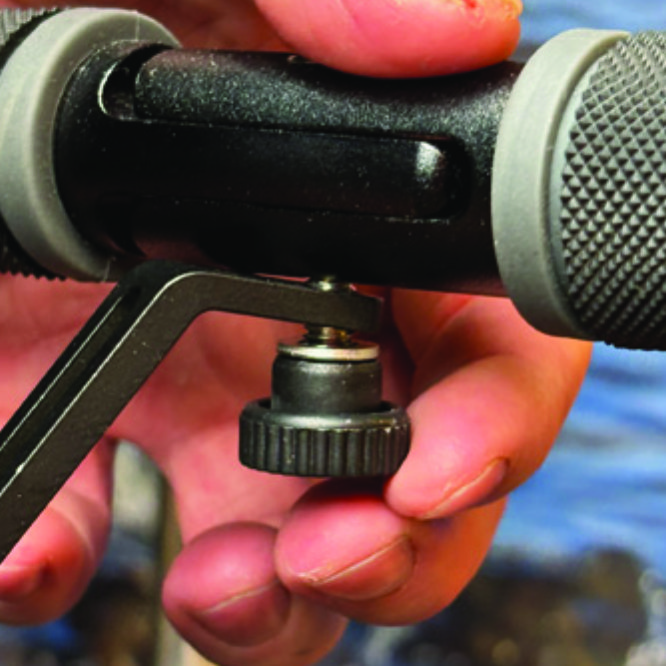
Attach the short angled end of the light holder to the lower end of the screw, on the downside of the grip bar. Fasten the holder with one washer and the knurled nut.
B3. Attach the short angled end of the light holder to the lower end of the screw, on the downside of the grip bar. Fasten the holder with one washer and the knurled nut.
For a more secure holder attachment, avoiding the holder to unintentionally turn sideways, replace the knurled nut with the included stainless steel nut and tighten it with a 10mm spanner.
B4. For a more secure holder attachment, avoiding the holder to unintentionally turn sideways, replace the knurled nut with the included stainless steel nut and tighten it with a 10mm spanner.
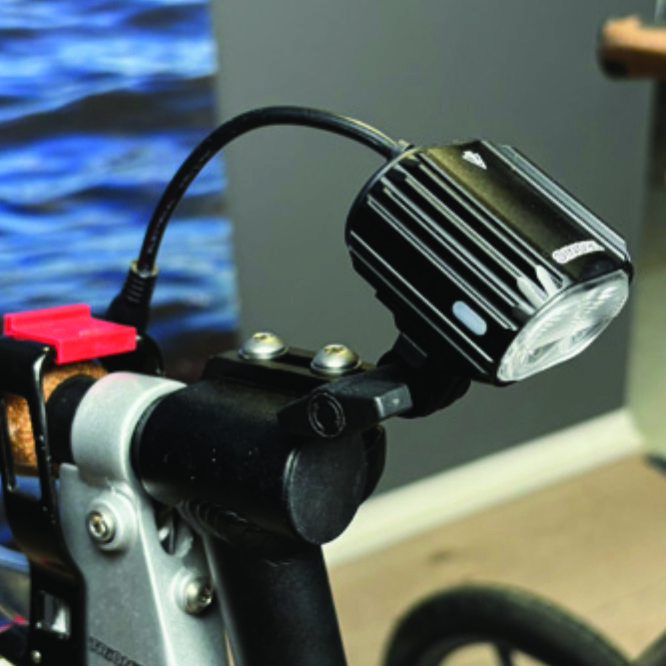
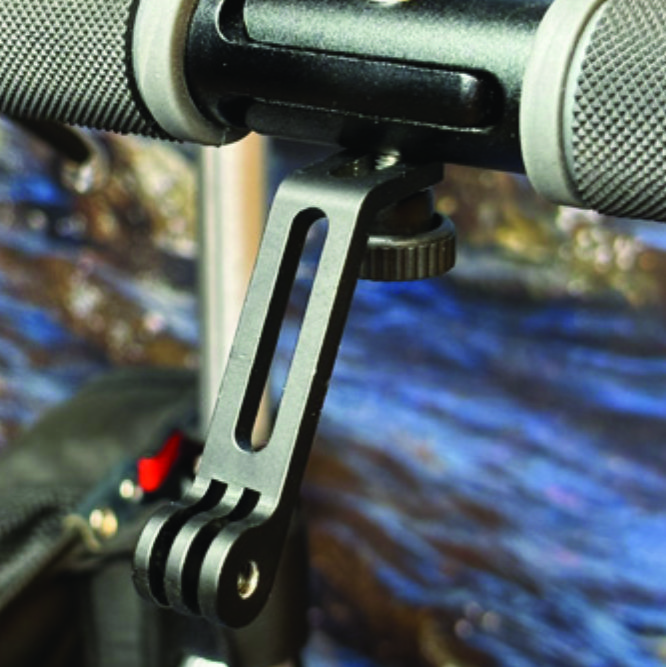
This photo shows the light holder as correctly attached.
B5. This photo shows the light holder as correctly attached.

Attaching the LED Light to the Holder

Instructions for a Walker
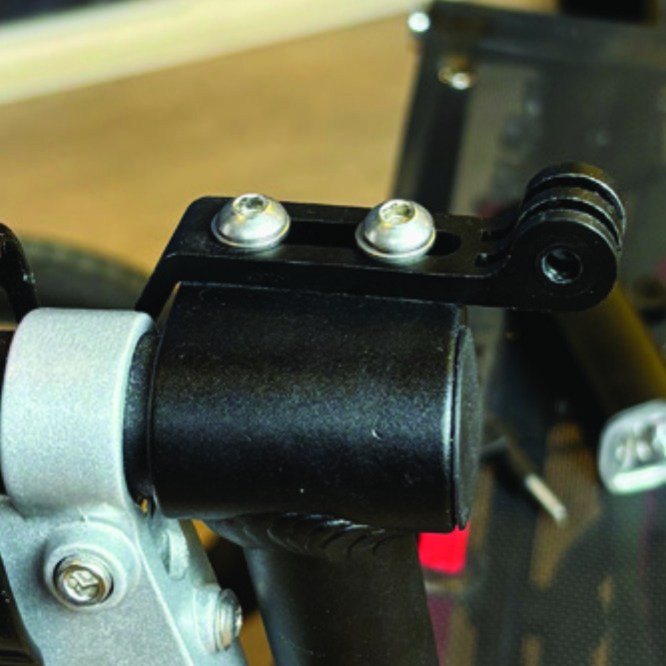
Identify the circular front end of the light holder, with two slots for attaching the light.
A6. Identify the circular front end of the light holder, with two slots for attaching the light.
Push the slotted bracket of the light into the slots of the holder and make sure they are aligned. Seen in the traveling direction of the Walker, enter the included wingnut from the left and tighten it.
A7. Push the slotted bracket of the light into the slots of the holder and make sure they are aligned. Seen in the traveling direction of the Walker, enter the included wingnut from the left and tighten it.

Instructions for a Veloped

Locate the screw at the center folding hinge of the U-shaped grip bar of the Veloped. Unscrew the screw with the included 4mm allen key and remove it.
B6. Locate the screw at the center folding hinge of the U-shaped grip bar of the Veloped. Unscrew the screw with the included 4mm allen key and remove it.
Identify the circular front end of the light holder, with two slots for attaching the light.
B7. Identify the circular front end of the light holder, with two slots for attaching the light.

Placing the Battery Pack

Instructions for a Walker
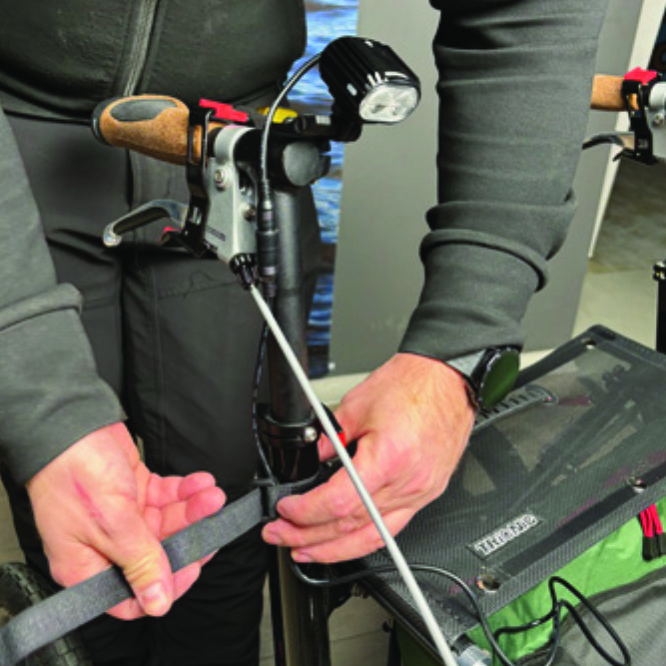
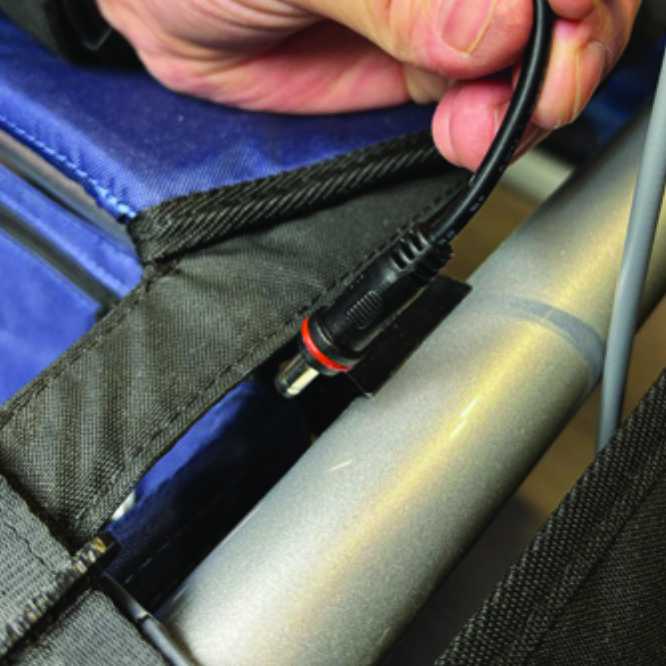
Run the longer extension cable along the semi-vertical grip tube of the Walker and secure it with the included velcro strap.
A8. Run the longer extension cable along the semi-vertical grip tube of the Walker and secure it with the included velcro strap.
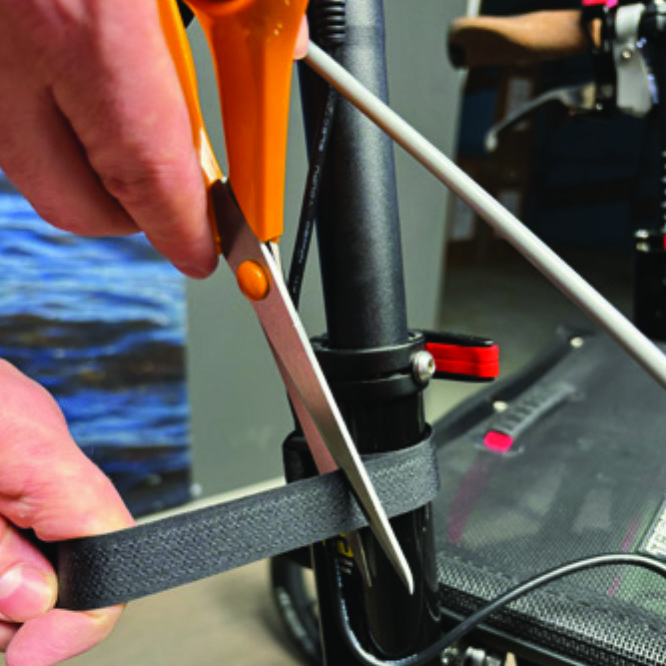
You can cut the excessive length of the velcro strap with a pair of scissors.
A9. You can cut the excessive length of the velcro strap with a pair of scissors.
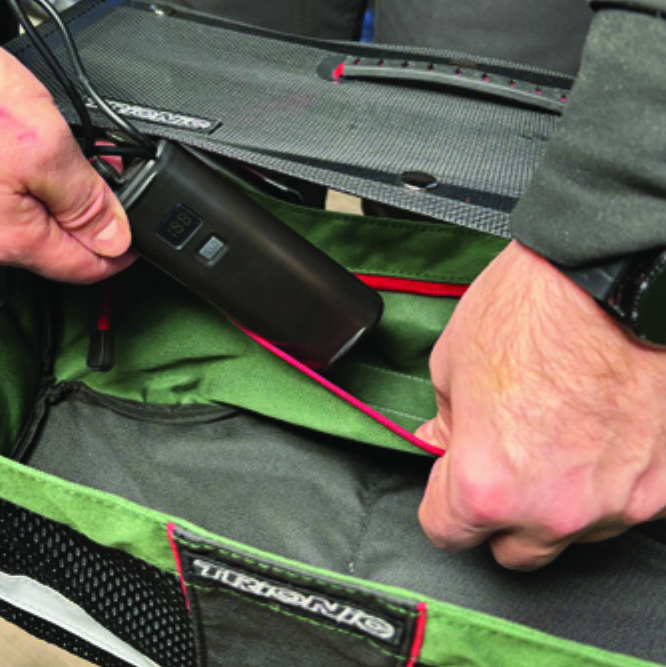
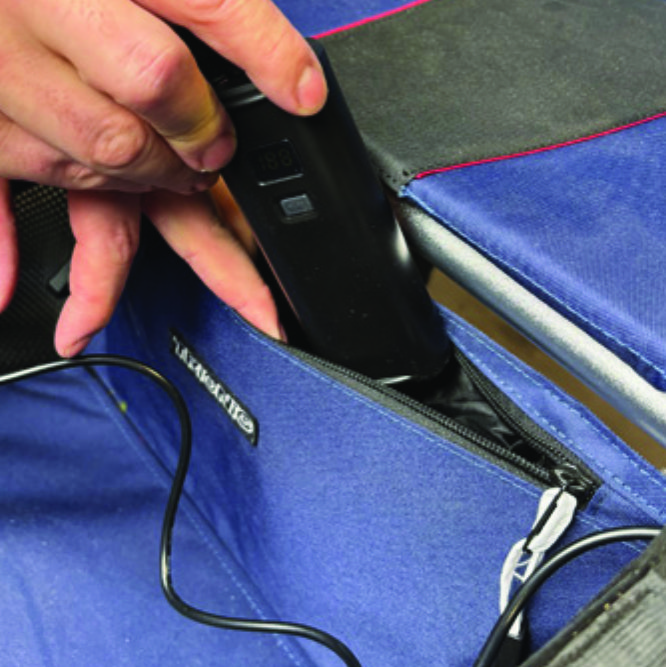
Place the battery pack in the rear zippered pocket of the basket.
A10. Place the battery pack in the rear zippered pocket of the basket.

Instructions for a Veloped

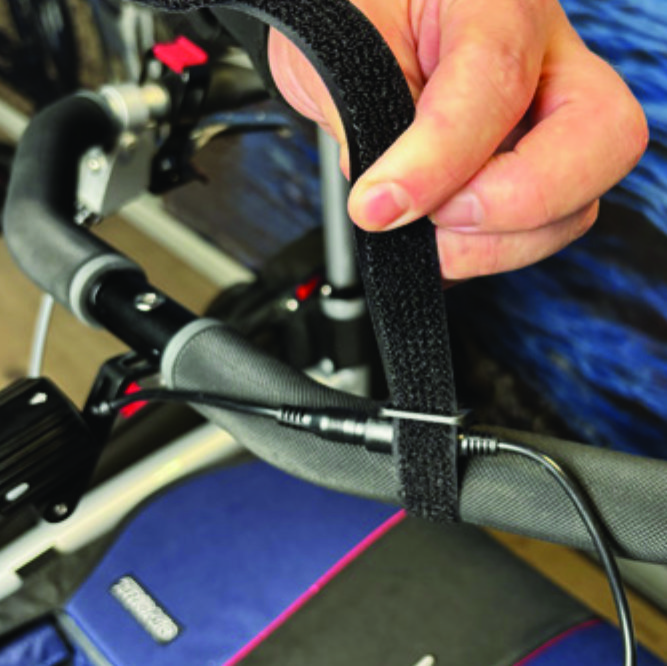
Run the longer extension cable along the U-shaped grip bar of the Veloped and secure it with the included velcro strap.
B8. Run the longer extension cable along the U-shaped grip bar of the Veloped and secure it with the included velcro strap.
You can cut the excessive length of the velcro strap with a pair of scissors.
B9. You can cut the excessive length of the velcro strap with a pair of scissors.
Place the battery pack in the rear zippered pocket of the basket.
B10. Place the battery pack in the rear zippered pocket of the basket.

The package contains

The package contains

How to operate the light

How to operate the light

Product Reviews    

  • Good Robust Walking Aid…

    I am very pleased with my new Trionic walker. The main reason I bought it was that my previous walker had small solid tyred wheels and was very uncomfortable on my arms and wrists particularly if the ground was uneven.

    My Trionic walker with its p…

  • Love it!…

    I already own a Veloped that I bought second-hand and use daily at our local country park so know how good the quality is and how useful they are. I wanted a smaller walker that would fit in the footwell of the car with the seat flipped up so I can t…

  • A truly excellent purchase…

    This machine re-writes what it means to be a "Walker". It far exceeds our expectations regarding ease of use and suitability as an outdoor walker.

    The unit is enabling my spouse, who has PD, to walk faster and straighter.

    It is only used ou…

  • Better Than All The Rest…

    Almost 2 months ago my amazing rollator, the Trionic Veloped 14er M green arrived. The rain didn't stop me from taking my new best friend for a walk. From that moment I've not looked back. I do look forward to going out with it every day. I walk fur…

  • Very satisfied…

    Very satisfied, more than satisfied. Satisfied with the product and very satisfied with the treatment from the seller. Delivery was fast and good.
    Summing up is VERY VERY SATISFIED CUSTOMER…

  • Good Chunky Lock…

    Bought this to chain up the walker on those occasions when I can't get the walker into a cafe or shop.
    Solid construction and so far has proved secure for my needs.…

    Wire Lock
    by Marie Smith
  • Thanks…

    Many thanks for making a truly great product, I have recently bought the 3/4 wheeled version and I have to say it has completely changed my life. I have used ordinary good quality rollators but could not take them for walks in the woods and sand, als…

  • Very stable even on bumpy terrain…

    The Walker is very helpful on cobblestones and forest paths, yet still relatively light, and a bit bulky in the car boot.…

  • Easier, more daily fun…

    They have really thought of the user! Everything is well thought out and with my Veloped, I dare to get out socially and not opt out of some activities. Safer, happier, which also means I need less help from people around me! Highly recommended!…

Subscribe to our newsletter!